

Stop Wearing Tangled Heirlooms and Repair Your Silver Necklace Today
Repair a Broken Silver Necklace Before It Gets Worse

Silver necklace repair is often simple when the break is at a jump ring or clasp. Place the necklace on a soft mat, inspect the damaged area under bright light, and use two smooth-jaw jewelry pliers to twist an open jump ring sideways. Then attach the chain or replacement lobster clasp and twist the ring closed until the ends meet with no visible gap.
Do not pull a jump ring straight apart. That turns it oval, weakens the metal, and makes another failure more likely. A detached pendant, open jump ring, or worn clasp is usually a realistic at-home fix. A snapped link in the middle of a fine, rope, snake, herringbone, or hollow chain is different: it often needs a jeweler's laser weld or careful solder repair.
Many necklace breaks happen at stress points after a snag, daily wear, or a heavy pendant pulling on a delicate chain. Fixing the small failure early can preserve a meaningful piece and prevent losing the pendant altogether.
I'm Morgan Price, a strategic backlink outreach specialist who researches practical, trustworthy resources for consumers and content teams. In this guide to Silver necklace repair, I focus on clear repair choices, the right tools, and when protecting an heirloom means handing it to a professional.
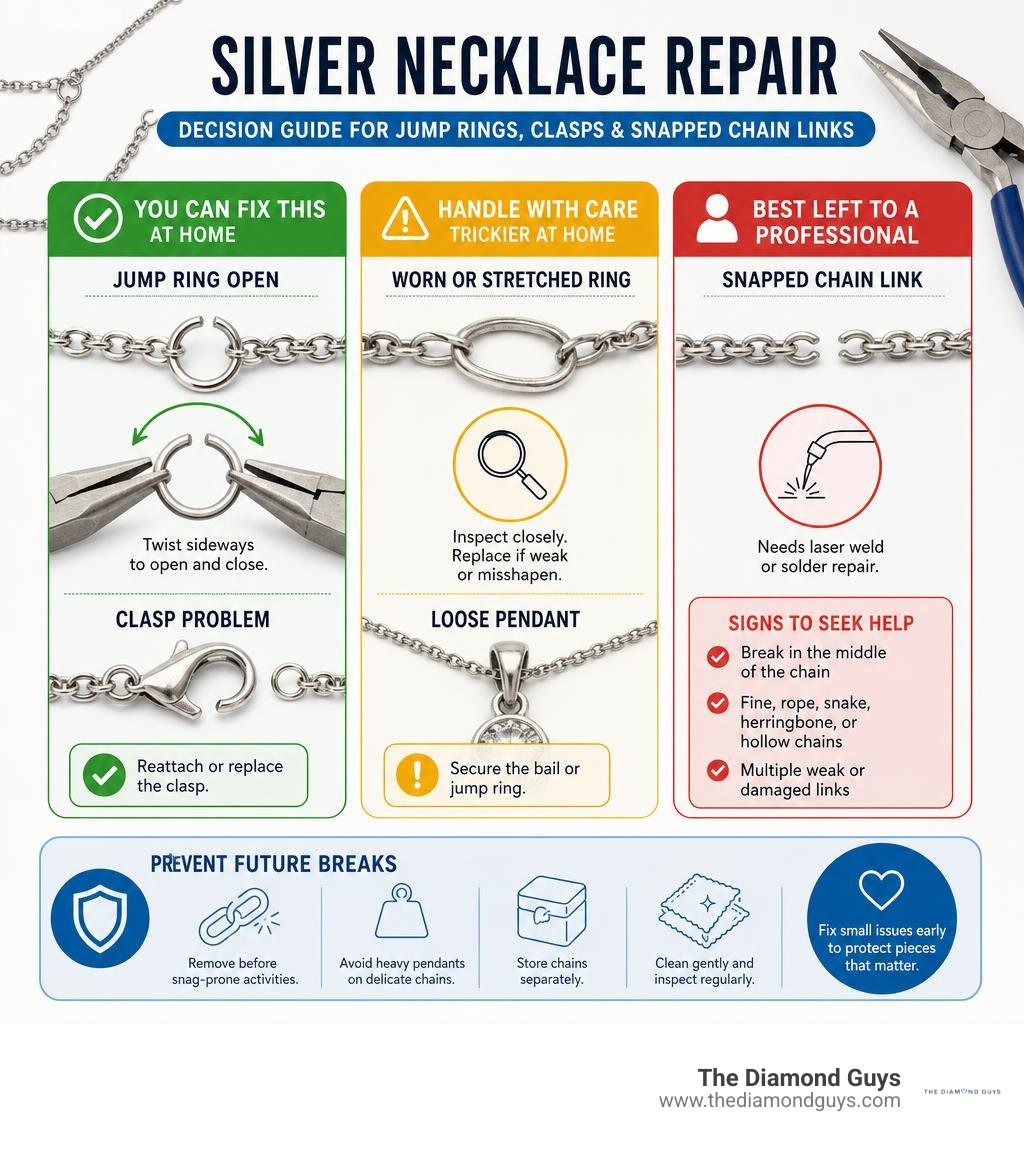
Silver necklace repair terms simplified:
Step-by-Step DIY Silver Necklace Repair for Broken Chains and Clasps
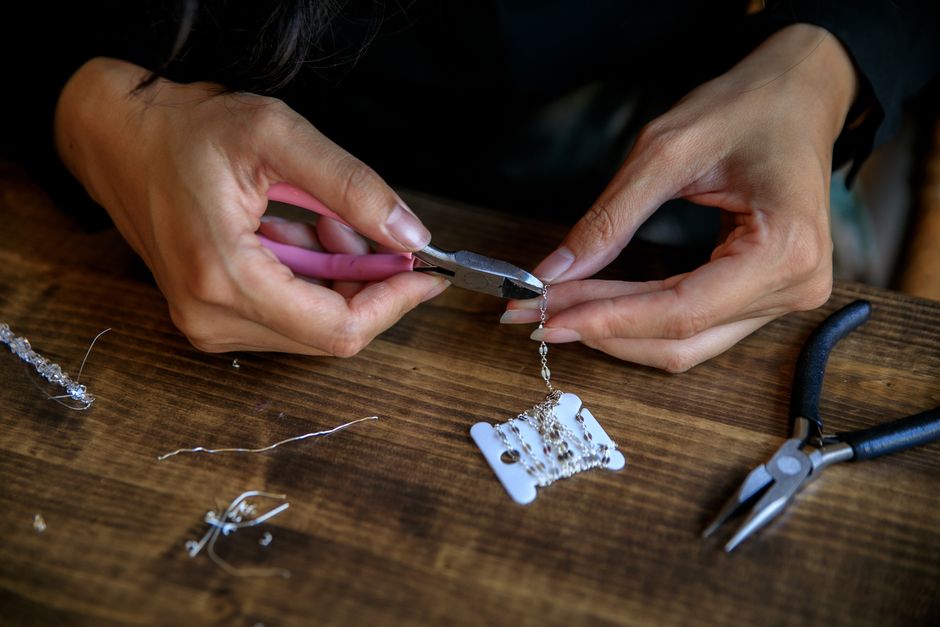
When dealing with broken jewelry, understanding the mechanics of your chain helps you fix it without compromising the structural integrity of the piece. Most necklace failures do not occur because the metal mysteriously snapped; they happen because an open jump ring pulled apart under tension or an internal steel spring inside a clasp gave out. In fact, many sterling silver jump rings are intentionally designed as a mechanical failsafe to open under sudden force, protecting the fine chain links—and your neck—from serious damage.
If your repair involves a loose finding, an open ring, or a broken clasp, you can easily perform a cold mechanical connection at home. DIY kits and jewelry findings sets are widely accessible—with popular sets boasting over 11,000 top ratings online—meaning you can source authentic sterling silver parts without hassle.
To choose the right components, always match the thickness (gauge) and style of your original hardware.
| Finding Type | Wire Gauge / Size | Best Used For | Key Advantage |
|---|---|---|---|
| Open Jump Ring (Light) | 22–24 Gauge (0.6–0.5 mm) | Ultra-fine cable chains, small charms | Discreet, fits tiny end links |
| Open Jump Ring (Standard) | 18–20 Gauge (1.0–0.8 mm) | Medium cable, curb, and box chains | High tensile strength, durable |
| Lobster Clasp | 9 mm – 12 mm | Everyday chains and heavy pendants | Secure locking mechanism, easy grip |
| Spring Ring Clasp | 5 mm – 7 mm | Delicate, lightweight silver chains | Classic, low-profile appearance |
| Beading Wire | 24 Gauge | Wire-wrapped gemstone pendants | Flexible, strong tensile support |
Essential Tools for Silver Necklace Repair
Before attempting any work, put away standard household garage tools. Serrated teeth on standard utility pliers will leave deep, permanent gouges in soft .925 sterling silver. Instead, assemble a dedicated jewelry tool set:
- Smooth-Jaw Flat-Nose Pliers: Provides a wide, flat grip across the wire of a jump ring without marring the polished metal surface.
- Chain-Nose Pliers: Features a tapered tip that allows precision handling inside narrow chain links and tight clasp loops.
- 10x Jeweler's Loupe or Magnifier: Essential for verifying that jump ring ends are aligned flush with zero daylight between them.
- Non-Slip Bead Board or Microfiber Work Mat: Keeps delicate silver links from bouncing away or sliding off your workspace.
- Flush Cutters: Designed to snip excess wire cleanly without leaving sharp, jagged edges against your skin.
- Replacement .925 Sterling Silver Hardware: Fresh jump rings and lobster clasps stamped with "925" to prevent future skin irritation and color mismatches.
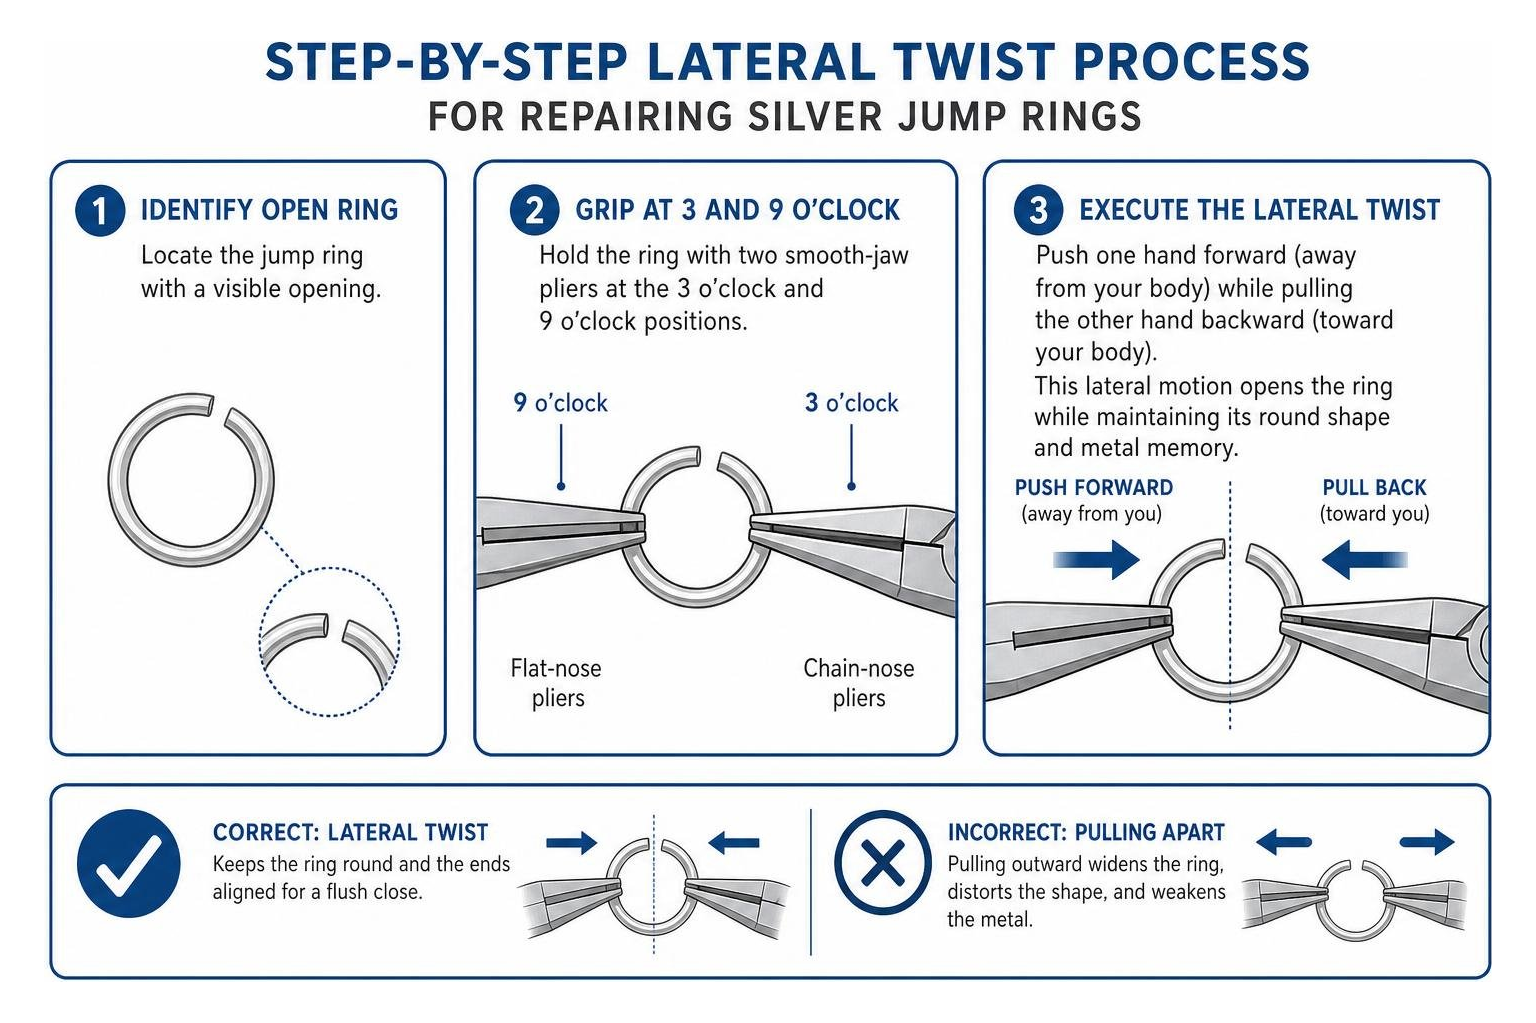
Step-by-Step Silver Necklace Repair: Fixing Clasps and Links
- Diagnose Under Magnification: Lay your necklace flat on the bead mat. Using your 10x loupe, examine whether the jump ring opened or if an internal chain link broke.
- Grip at the 3 and 9 O’Clock Positions: Hold the open jump ring using two pairs of smooth-jaw pliers. Place your flat-nose pliers at the 9 o’clock position (left side of the slit) and your chain-nose pliers at the 3 o’clock position (right side).
- Execute the Lateral Twist: Never pull the ends outward away from each other horizontally. Instead, push one hand forward (away from your body) while pulling the other hand backward (toward your body). This lateral motion opens the ring while maintaining its round profile and preserving the metal’s memory.
- Thread the Hardware: Slide the end link of your chain and the base loop of your new lobster clasp onto the open jump ring. If reattaching a fallen charm, review a comprehensive DIY guide to repairing a sterling silver chain to verify bail clearance before clamping down.
- Achieve a Flush Closure: Reverse the lateral twist, bringing the two wire ends back together. Gently twist slightly past the meeting point and back again until you feel or hear a light click. This slight back-and-forth motion work-hardens the sterling silver, locking it under spring tension.
- Inspect for Gaps: Check the seam under your loupe. The two cut ends should touch completely flush with no visible space for fine chain links to slip through.
When to Avoid DIY: Advanced Soldering and Delicate Chain Types
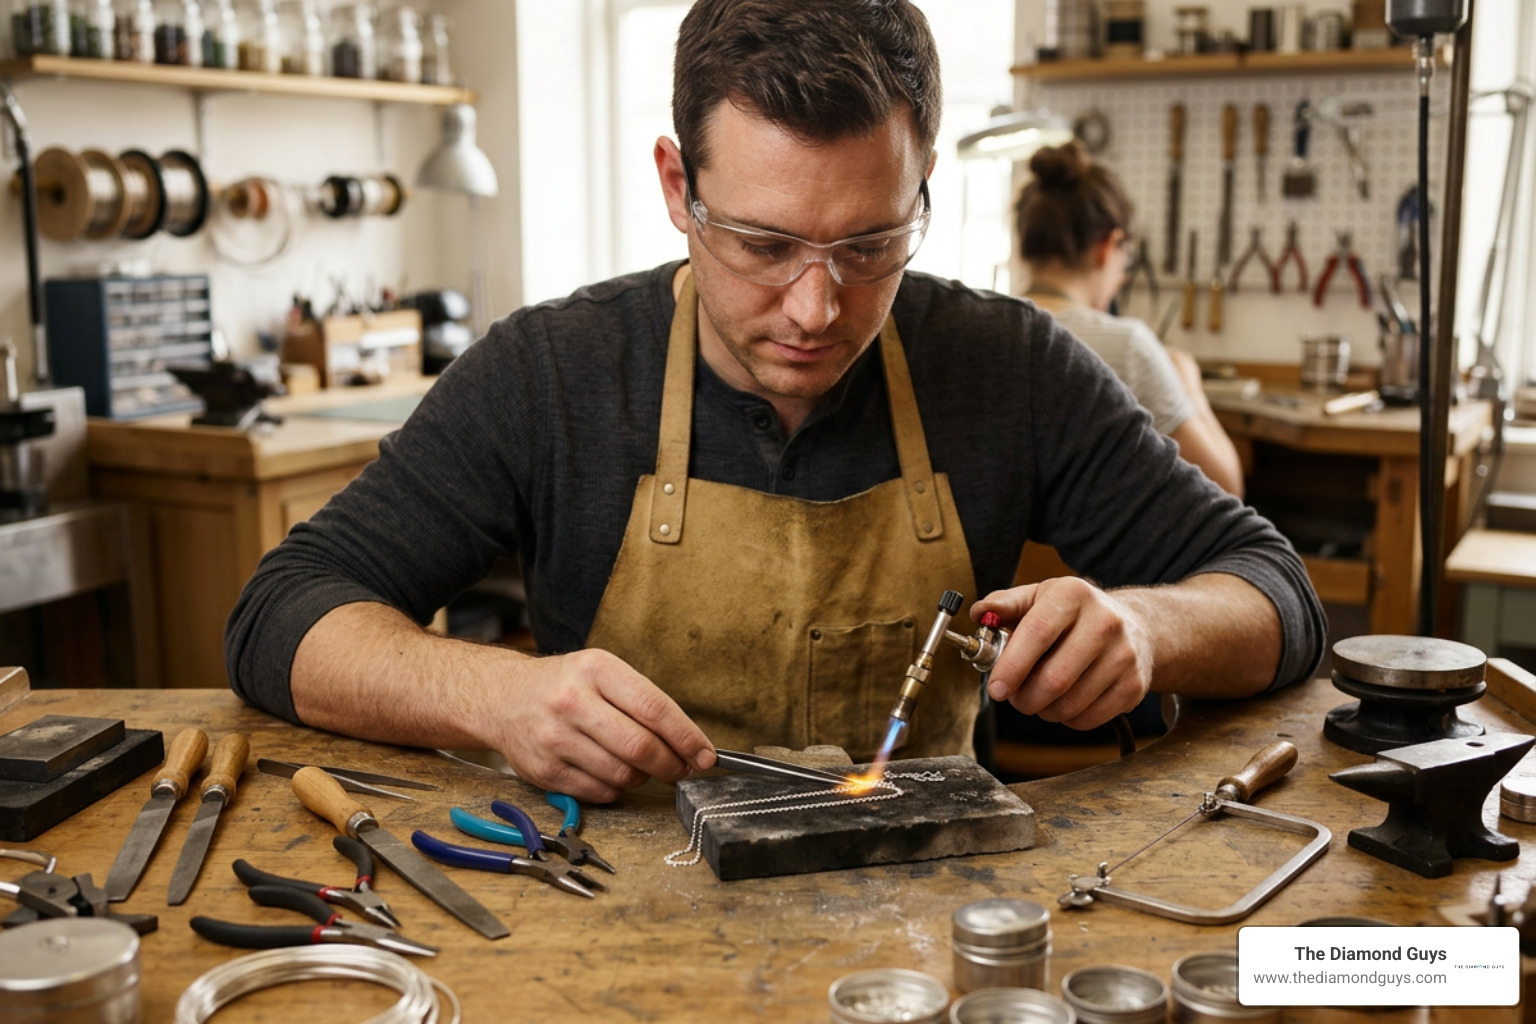
While mechanical fixes handle clasps and jump rings, structural chain fractures are an entirely different challenge. Sterling silver consists of 92.5% pure silver and 7.5% copper. This alloy is an exceptional thermal conductor, meaning heat from a torch instantly travels across the entire piece rather than staying isolated at the break point.
Attempting to solder a broken chain link at home with a hardware store soldering iron will not work; electrical irons reach only a fraction of the 1,200°F+ required to melt silver solder. Furthermore, micro-torch soldering delicate weaves requires advanced techniques:
- Antiflux Application: Jewelers must paint antiflux for at least 0.5 cm along neighboring links to keep liquid solder from freezing the entire chain into a stiff, immovable rod.
- Solder Grade Selection: Using low-melting-point "Easy" or "Easy45" solder (melting around 1,240°F) prevents melting the surrounding chain links (which melt at approximately 1,640°F).
- Firescale Mitigation: Heating silver exposes the copper alloy to atmospheric oxygen, creating stubborn, dark sub-surface firescale that requires chemical pickling and extensive re-polishing to remove.
Certain complex weaves should almost never be tackled as home projects. Snake chains, herringbone necklaces, hollow rope chains, and fine box chains rely on intricate interior links or hollow structures. When these break, applying heat without micro-tooling will collapse the walls or fuse the links, destroying the fluid movement of the necklace forever.
Professional Restoration vs. At-Home Fixing
When dealing with heirloom pieces, precious gemstone settings, or delicate chain designs, bench jewelers rely on specialized, state-of-the-art equipment. Laser welders and micro-arc welders focus an intense, microscopic beam of energy directly onto the break point for milliseconds. This creates a permanent fusion without heating the rest of the necklace.
In advanced jewelry conservation, master artisans utilize pulse arc welding conservation techniques to rebuild damaged silver structures using matching .925 sterling silver wire rather than low-temperature solders. This ensures the seam will not tarnish at a different rate or create a noticeable color discrepancy over time. Furthermore, heat-sensitive stones like opals, emeralds, pearls, and turquoise will crack or discolor under a jeweler's torch; laser micro-welding allows repairs right next to delicate gemstones without needing to unset them.
Preventing Damage and Caring for Repaired Sterling Silver
A proper repair should last for decades, provided you take steps to minimize mechanical strain and environmental exposure. Sterling silver naturally reacts with airborne sulfur compounds and moisture, causing chemical tarnishing over time.
- Avoid Chemical Stress Corrosion: Never wear your silver necklace in swimming pools, hot tubs, or while cleaning. Chlorine and bromine induce stress corrosion cracking in sterling silver alloys, making the metal brittle and prone to shattering under light tension.
- Implement Safe Storage Habits: Store your necklaces individually inside soft fabric pouches or airtight zip-top bags with anti-tarnish strips. Fasten the clasp and leave a small section of the clasp end sticking out of the bag seal to eliminate tangling and knots.
- The "Last On, First Off" Rule: Apply all perfumes, hairsprays, body lotions, and cosmetics before putting on your silver jewelry. Remove chains before exercising, doing yard work, or sleeping to prevent snags on clothing and bedding.
- Routine Clasp Spring Inspections: Clasp mechanisms rely on internal steel springs. Periodically inspect your lobster and spring ring clasps; if the lever feels sluggish or fails to snap back instantly, replace the finding before the clasp opens unnoticed.
Frequently Asked Questions About Silver Necklace Repair
Can you fix a silver necklace chain without soldering?
Yes. If the failure occurred at a jump ring or clasp attachment, you can complete a mechanical cold connection using smooth-jaw pliers and genuine .925 sterling silver replacement findings. Snapped links in the middle of a continuous weave, however, require professional soldering or micro-laser welding to regain structural strength.
Why should you never use superglue on a silver necklace?
Superglue (cyanoacrylate) forms a brittle bond that quickly fails under the physical weight and movement of a necklace. More importantly, adhesive leaves behind a chemical residue that burns and carbonizes into the microscopic pores of the silver when heated. This black carbon layer prevents solder from flowing properly, complicating future professional repairs.
How do you match the finish on replacement silver findings?
Standard sterling silver features a bright, warm metallic white tone. If your necklace is rhodium-plated for high-shine tarnish resistance, select rhodium-finished sterling silver findings. For vintage or antique chains with dark accents in the recesses, you can apply a mild patination solution (such as liver of sulfur) to your replacement jump ring, followed by a light buffing with a silver polishing cloth to seamlessly match the oxidized look.
Conclusion
A broken silver necklace does not have to remain hidden in your jewelry box. By diagnosing whether your piece suffered an open jump ring, a worn clasp, or a severed chain link, you can confidently choose between an accessible at-home fix and professional intervention.
When your cherished heirlooms, intricate chain weaves, or gemstone-set pieces require precision laser welding, our team at The Diamond Guys provides transparent, expert care. Consult our comprehensive jewelry repair guide or visit our Scottsdale, AZ showroom to restore your favorite jewelry to pristine, wearable condition.


